Manual lead qualification can be a daunting and time-consuming task. Oftentimes, it is improperly done and inaccurate (Imagine spending hours qualifying leads only to have your sales team reject them because they don’t meet the Sales Qualified Lead (SQL) criteria.)
According to a survey conducted by Business2community, 67% of lost sales are a result of not properly qualifying leads before taking them through the full sales process.
So, how can you ensure that your leads qualify as MQLs and SQLs before moving them through your sales funnel? Use a comprehensive Customer Relationship Management (CRM) automation tool.
A CRM automation tool can help you automate, fine-tune, and make your lead qualification and management process smooth and easy. In this blog, we delve deep into how you can get started by using one of our favorite business automation tools – HubSpot. Let’s dive right in.
What is Lead Qualification?

Lead qualification is the process of determining if your sales prospects have the right attributes to become customers. It involves identifying which prospect matches your ideal customer profile, including how well your product or service fits their needs and how ready they are to make a purchase.
An effective lead qualification process is key to a successful sales process, as qualified leads are more likely to be interested in your product or service. When this is done quickly and with more precision, you’ll be able to streamline your sales process and increase your chances of closing more deals.
Benefits of Qualifying Leads With a CRM Tool

CRM automation tools streamline your lead qualification process. A Demand Metric Research Corporation study showed that 84% of sales companies believe that CRM software is beneficial in determining lead quality.
Whether it’s matching leads to corresponding opportunities or categorizing leads based on their activity, these tools make the process more efficient and faster. CRM tools help to:
1. Identify More Qualified Leads
With CRM automation tools, you can set up lead-qualification features that assess leads based on specific criteria and behaviors. This means that you can accurately identify and prioritize leads who are genuinely interested and more likely to convert.
On the flip side, you’ll be able to take out prospects who aren’t likely to buy and focus more on prospective customers.
2. Speed up the Sales Cycle
CRM tools accelerate the sales cycle because you can automate the lead-capturing process to reduce administrative time and also speed up the qualification process.
After qualifying leads, your sales teams can immediately engage them and reduce the time it takes to move leads through your sales pipeline. Faster lead qualification and response times can lead to quicker conversions and higher ROI.
3. Save Resources
The average sales funnel often attracts a mix of prospects, and trying to convert all of them is resource-intensive and unrealistic. Setting up a lead qualification workflow in your CRM tool will streamline the scoring, qualification, and segmentation process.
This ultimately helps to determine where to concentrate your lead nurturing efforts and reduces marketing costs while delivering more sales-ready leads.
4. Align Sales and Marketing Efforts
CRM automation tools allow your sales and marketing teams to collaborate in a single platform. They have access to and can share similar information and insights.
These tools also ensure that your marketing team generates leads that align with sales objectives and allow sales to provide feedback on lead quality.
How to Qualify Leads With HubSpot CRM Tool

The process of qualifying the leads in your database primarily depends on your unique needs and business objectives. However, HubSpot offers the flexibility to customize and scale your lead qualification procedures and assists in pinpointing your most promising leads effectively.
To qualify your leads with HubSpot, there are two significant steps you must take.
Step 1: You’ll need to determine what makes a prospect become a lead.
Step 2: You’ll need to identify which leads to send to your sales team.
Let’s take a closer look.
Step 1: Defining What Turns a Prospect into a Qualified Lead
To define what your business’ qualified lead looks like, create an ideal customer profile (ICP) or a buyer persona. An ideal customer profile is a checklist of the most fundamental attributes an individual or a company must have to be your customer.
Determine precise requirements for your ideal customer profile and list them out. Your ICP should include job titles, company type and size, industry, budget, location, challenges, buying triggers, budget, and goals.
If you already have an existing customer base, import them into your HubSpot account and use the Contact Property settings to save these attributes against each contact in your Hubspot CRM.
To assess Contact Property in your HubSpot account, click the settings icon in the main navigation bar and navigate to Properties in the left sidebar. You should see a list of default Contact Properties such as First Name, Last Name, Job Title, and Annual Revenue.
To create a Custom Contact Property, click Create Property, fill in the basic information, field type, and rules of the property, and click Create.
If you want to see that property in action, navigate to Contact > Contacts and click on a contact to open. Then click Actions and click on View all properties. Use the search bar to search for the new property you created, and you can add it to the contact’s About card.
Then, you can identify prospects who are your ideal customers and the traits they share. If someone meets all your requirements, they are an excellent fit for your company and should be your top priority.
After defining your ICP, develop your lead qualification criteria. A prospect might be a great fit, but are they ready to make a purchase? Determining what actions represent readiness to convert or buy from you is essential.
It could be the number of visits to your product or service page, when they request a demo, or when they view your pricing page.
In a nutshell, by determining your ideal customer profile and the actions that demonstrate that they are ready to buy, you’d have created the criteria for “qualified leads” in your business.
Step 2: Identifying Qualified Leads
After defining what your business recognizes as qualified leads, the next step to take is identifying prospects who fit into the criteria. Thankfully, HubSpot’s Build a List and Create a Saved View features can help you achieve that seamlessly.
How to Use Build a List Feature to Identify Qualified Leads in HubSpot
In your HubSpot account, navigate to Contact > List > Create list. Choose between a contact-based or a company-based list. Then, provide a name for your list.
Select whether you’d like to create an active list that updates automatically over time as your contact’s properties change or a static list that doesn’t update and is appropriate for a one-off email blast.
After selecting an appropriate list, click next and filter your new list with properties such as industry type, actions on your website, country, and others. Then, apply the filter. You can add more filters by clicking ‘AND’ and selecting the filter.
Once you’re done, click save. HubSpot will process your list, and it’ll be ready to use within a few minutes.
How to Use Create a Saved View to Identify Qualified Leads in HubSpot
Select Contacts in your HubSpot menu, and then select Contacts again. You can choose a different object to create a saved view by selecting Contacts in the tab section on the top left corner and picking your preferred object from the drop-down.
Select Add View on the tab section and click Create New View. Provide a name for your new view, choose who you’d like to share this view with, and click save.
You can filter your new view by clicking Advanced Filters below the tab section and Add Filters.
You’ll see a view of all the contacts that meet your criteria. Then click Save View.
Other Ways to Use HubSpot to Improve Your Lead Management Process

Lead qualification is a major stage in the lead management process. But the work doesn’t start or end there. To move prospects through your sales funnel without many hiccups, it is equally important to streamline how you capture leads and organize and segment them. Here’s how to go about lead capturing and organization and lead segmentation using HubSpot.
1. Lead Capturing and Lead Organization on HubSpot
You can capture and organize new contacts (prospects) automatically on HubSpot using three features. These include hidden form fields, sync lifecycle stage settings, and workflows.
Hidden Form Fields
Hidden Form Fields usually help to capture extended contact details. When added to your lead capture forms, they gather information that aren’t visible to your website visitors and pass property values to your contact record without requiring new prospects to fill in too many form fields.
For instance, each time a website visitor subscribes to your newsletter, you can automatically set a lifecycle property that segments them as a subscriber. Or when they fill out a “Request a Quote Form”, you can automatically set their status as Open (indicating that the contact requires a follow-up) without the contact filling in that field.
To set a form with hidden fields, navigate to Marketing > Lead Capture > Forms in your HubSpot account. Click on a form or create a new form. Select Embedded Form to create a form that you can add to your website, and click Next.
Pick a template from the left sidebar and click start. Hover over a form field to hide and click the pencil icon. Then, click to toggle the “Make this field hidden” switch on. Select the property value you want added to the contact when the form is submitted and click Publish.
Sync Lifecycle Stage Settings
The Sync Lifecycle Stage settings will help you organize your contacts and their corresponding company records.
A perfect use case is when two contacts from the same company are currently in your lead pool. To ensure that they move through the lead qualification stages simultaneously and get consistent communication from your team, you’ll need to use the Sync Lifecycle Stage feature. It automatically moves the two contacts to a new stage when their primary associated company’s stage changes.
To use this feature, click the settings icon in the main navigation bar in your HubSpot account. In the left sidebar menu, navigate to Objects > Contacts > Lifecycle Stage. Then, select the Sync lifecycle stages checkbox and save.
Workflows
HubSpot workflows help to automate actions such as updating a large number of contacts and companies in your CRM. You can set up enrollment criteria, and when a contact meets them, the workflow will trigger certain actions based on your pre-defined criteria.
Below are some of the repetitive lead management tasks you can automate with a HubSpot workflow:
- Assigning lead owners evenly among team members whenever new leads are generated.
- Updating lifecycle stages.
- Disqualifying leads you don’t want to nurture.
- Notifying your sales team when a contact becomes an SQL (Sales Qualified Lead).
- Triggering an action that encourages contacts to do things like booking a demo when they visit your product or service page.
To set up a workflow, navigate to Automation > Workflows, click Create Workflow, and select Start from scratch. In the left panel, select Contact-based workflow, then in the right panel, select how you want the workflow to start and click Next.
Add your enrollment triggers, actions, and delays and click Review and Publish.
2. Lead Segmentation on HubSpot
Lead segmentation helps you divide your contacts into sub-groups based on shared criteria, including goals, needs, and where they are in the buyer’s journey. It also helps to segment your contacts for nurturing and sales.
To create a basic lead segmentation process in your HubSpot account, you can use the default Lifecycle Stage properties, including “subscriber”, “lead”, “marketing qualified lead”, “sales qualified lead”, “opportunity”, “customer”, and “evangelist”. This will guide you in sending tailored, automated, but personal communication to your contacts without jumping the gun.
As your needs evolve, you can create more segments or hire a HubSpot automation expert for advanced setups.
3. Lead Prospecting on HubSpot Sales Hub
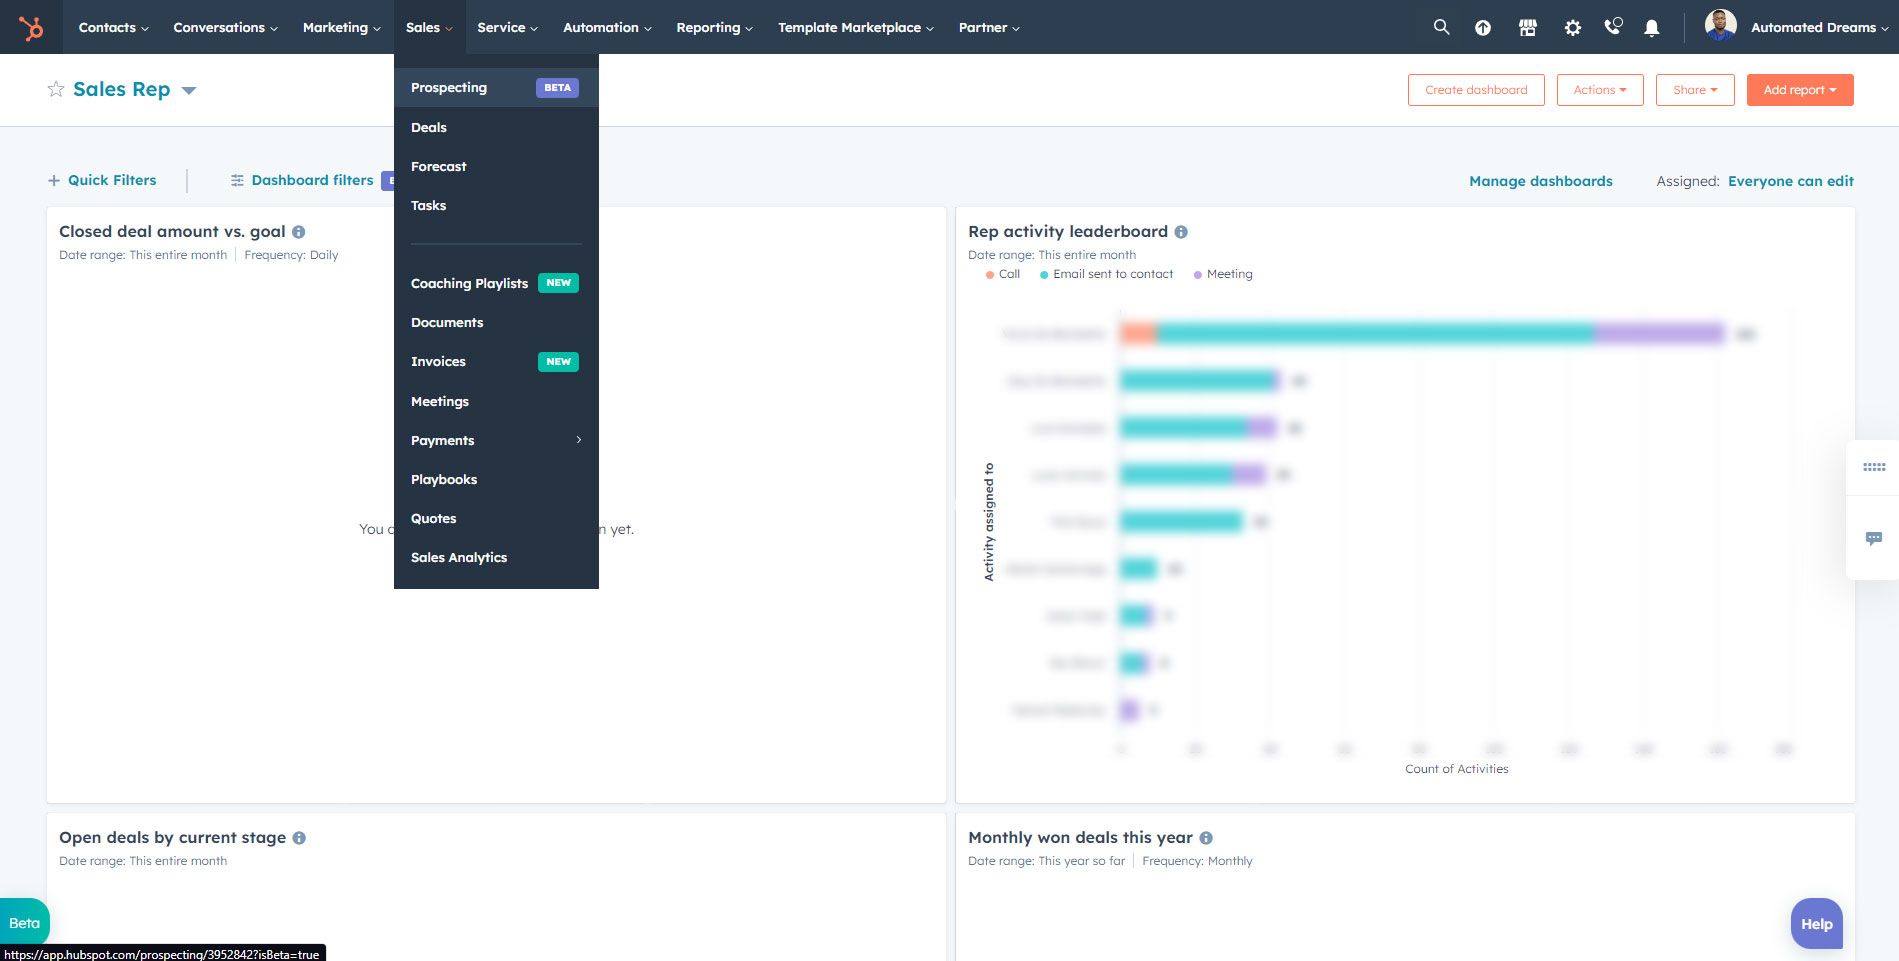
You can also nurture prospects and improve your lead management process with HubSpot Sales Hub. From the Prospecting workspace, you can view your leads, their stage in the sales funnel, and their last and next activity with your team.
If you reach out to a new lead, HubSpot automatically moves their stage from New to Attempting in the sales funnel. You can also automatically set their next activity, such as sending them an email at a set time. This makes it easier to track your prospects and follow up on them.
To access the Prospecting workspace from your HubSpot account, navigate to Sales > Prospecting. To view your prospects, click on Leads.

Key Takeaways
Lead qualification can help you generate marketing/sales-qualified leads and get the best results from your marketing strategy. However, you must take the right steps – as discussed above – when trying to qualify and segment your leads.
HubSpot’s CRM automation tool is a game changer as it makes the entire lead management process smoother and more effective through lead capturing, organization, segmentation, nurturing, scoring, routing, and measurement.
If you’re new to HubSpot or would like to take advantage of HubSpot’s advanced lead management features, book a free call with one of our HubSpot-certified consultants to discuss your goals and see if we are a good fit for your organization. Let’s make HubSpot work for you!


